How to make pieced borders fit perfectly without coping (or fudge) pieces

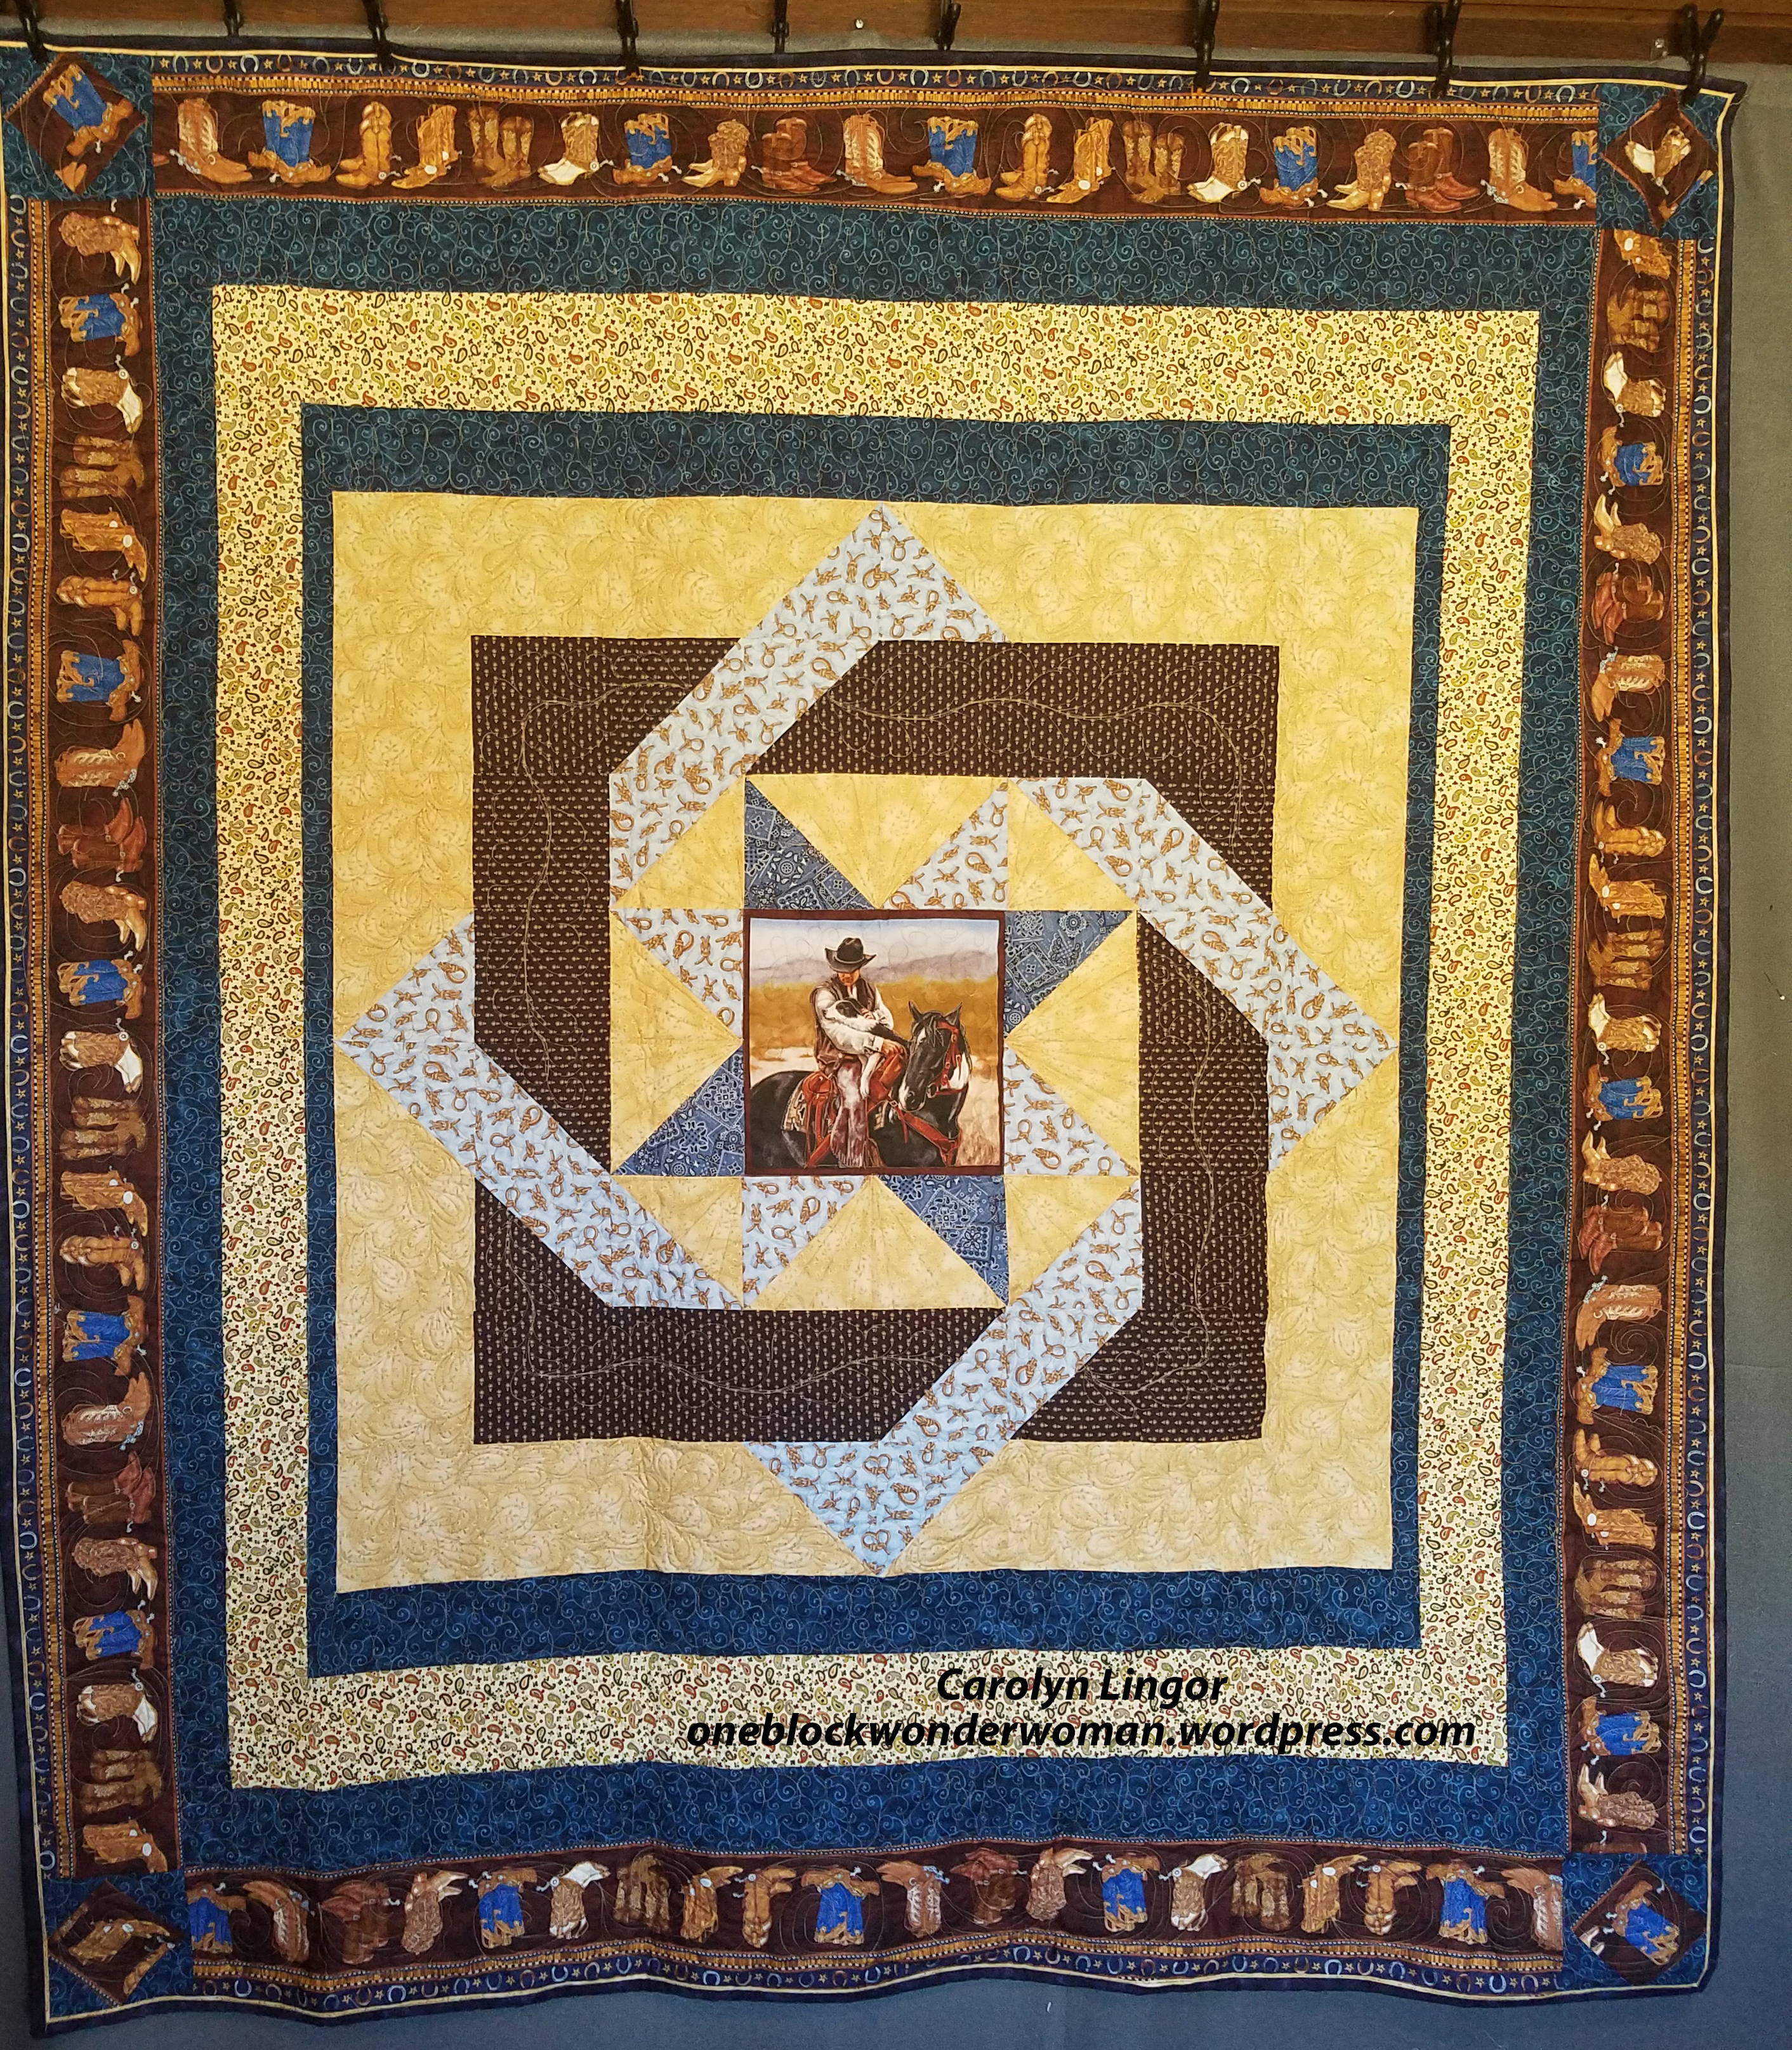
I just finished putting a pieced border on this quilt.  The pattern is a block of the month by Pat Sloan called Let’s Go Camping.  As you can see, my pieced border fits perfectly all the way around and I didn’t have to spend a lot of time trying to find a way to put an oddball piece of fabric somewhere in the border to make it happen.  Most of the time, I’ve found those coping, fudge or cheater pieces don’t look quite right.  I kind of accidentally came across the solution I use now when I was doing a baby quilt a number of years ago.  I’m sure someone else came up with this technique long before I did, but I’ve never seen it anywhere, so cannot give proper credit to anyone.  This will be a wordy post, since I didn’t take any photos during the process, but I think you will find it worthwhile to read through to learn the process.  Also keep in mind that I am mathematically challenged, so it is amazing that I figured this out.  Quilting has definitely improved my math skills.

My goal for this quilt is to fit on our queen sized bed in our cab-over camper, so since the pattern made it come out as a square, I knew I would need to make some of the top and bottom borders larger than the side borders.  I picked out a coordinating fabric, the footprints in the sand, to put as a “plain” border between the dark brown and the pieced border.  The next thing I decided was how large I wanted my pieces in the pieced border to be.  I chose a 4″ finished size square-in-a-square since the size of the quilt, both length and width, was close to being evenly divisible by 4.  So I figured I would need about 15 pieces for the side borders and 14 for the top and bottom.  Keep in mind you will need to make 4 extra pieces for the corners.   I do not take into account these corner pieces in any of the measurements.  That would just add more confusion to the whole process and it’s simple to just add on the corner pieces when you have everything else calculated out.  Also notice that I haven’t yet even touched the “plain” border fabric.

I went ahead and assembled the required number of pieces for each edge of the quilt.  The reason I assemble the pieced borders first is so that I don’t have to take into account all those seam allowances.  I then measured the length of the completed pieced borders and the 4 edges of the quilt and immediately wrote the numbers down since they fall out of my brain almost immediately.  All of the pieced borders were slightly larger than the edges of the quilt, just as I had planned, but since I needed to make the top and bottom plain border quite a bit larger to elongate the quilt and there was only a one-ish inch difference between the sides and top and bottom plain border width, I decided to add an extra piece on the pieced borders for the sides, and I also decided it would be best to work on the plain side borders first to get maximum length out of the top and bottom borders.

The plain side borders are adding width to the quilt, whereas the top and bottom plain borders are adding length.   So the plain side borders have to be cut to accommodate the size of the top and bottom pieced borders.  The plain top and bottom borders have to be cut to accommodate the size of the side pieced borders.  It seems a little counter-intuitive at first, but it definitely works.

Here are my calculations for how much plain border I needed on the sides, which, as I said, I calculated first.  The top and bottom of the quilt (width) measured 54.25 inches and the top and bottom pieced borders measured 59.25 inches.  So that means I needed a total of 5 inches added to the sides of the quilt to fit the pieced borders.  I divided that 5 inches by 2 so I have equal sized pieces on each side of the quilt which comes out to 2.5 inches.  Then, very important, I added 1/2 inch for seam allowances to each piece.  Don’t forget your seam allowances as I tend to do. So I knew I needed to add a 3 inch piece of plain border to each side of the quilt.  I then measured the length of the quilt and cut the plain border that length.  I then attached the plain side borders.

To make the plain top and bottom borders to add length, I again measured the length of the quilt, which was 56.5 inches, and then the length of the side pieced border strips, which was 67.5 inches.  67.5 minus 56.5 equals 11 inches, divided by 2 for the top and the bottom plain border, which equals 5.5 inches then adding in 1/2 inch on each piece for seam allowances, comes to 6 inches.  So I cut my top and bottom pieces at 6 inches by the width of the quilt and attached them.

I then double checked my pieced borders and they fit like a dream along the plain borders.  Then I added the four corner square-in-a-square pieces to the top and bottom borders, attached the side pieced borders first and then attached the top and bottom pieced borders with the added corner pieces.  Everything came out perfectly as you can see.

I hope all that makes sense to everyone.  One thing I wanted to add is that if something comes out to an oddball size, like one side of the quilt is 1/8th of an inch longer than the other side, I usually go with the slightly smaller measurement since there is usually a little leeway in a long pieced border.

I’m excited to finish up my camping quilt since we have a new to us camper with a bathroom!!!  Hallelujah!!!   Of course, I laid down the law last time we went camping.  I said I would never go camping again until dear hubby bought me a camper with a bathroom after an unfortunate incident at 2 o’clock in the morning while broken down in a parking lot near Lake Shasta involving a small bucket and a yard sale purchased toilet seat on legs and a loss of dignity followed by a lot of yelling and the purchase of new pajamas the next day.  I will leave the details up to your imagination.  It’s funny now, but…..Just waiting for dear hubby to finish necessary modifications so that the camper will fit on our camper truck.  The camper truck has what’s called a utility bed with tool boxes on the side that open out.  This means that the bed of the truck is 4 feet wide all the way from the cab to the back with no wheel wells for a little corner of the bathroom to slide into.  He has restructured that portion so it will fit, but now we are concerned that the little decorative apron thingies that slope down toward the back of the camper on the sides might interfere with the opening of the tool boxes, so they might have to get trimmed back.  They are only “decorative” so shouldn’t be a problem.  Also the restructured area in the bathroom needs to be re-fiberglassed since it is a wet room style shower.

The photo at the top doesn’t do a good job on some of the detail I put into the quilt.  I had fun with my embroidery machine.  The blocks each had a theme that they are supposed to represent.  This one was “Things we take on a camping trip”.  I stitched out one of dear hubby’s favorite fishing lures.

This one is “Things we do while camping”.  You can probably tell which is dear hubby and which is me.

This one is themed “Stirring the pot”

This one is “Things we see”

And this one is “Things we camp in”  Sure it’s a trailer, not a cab-over, but it’s cute and a design I had.

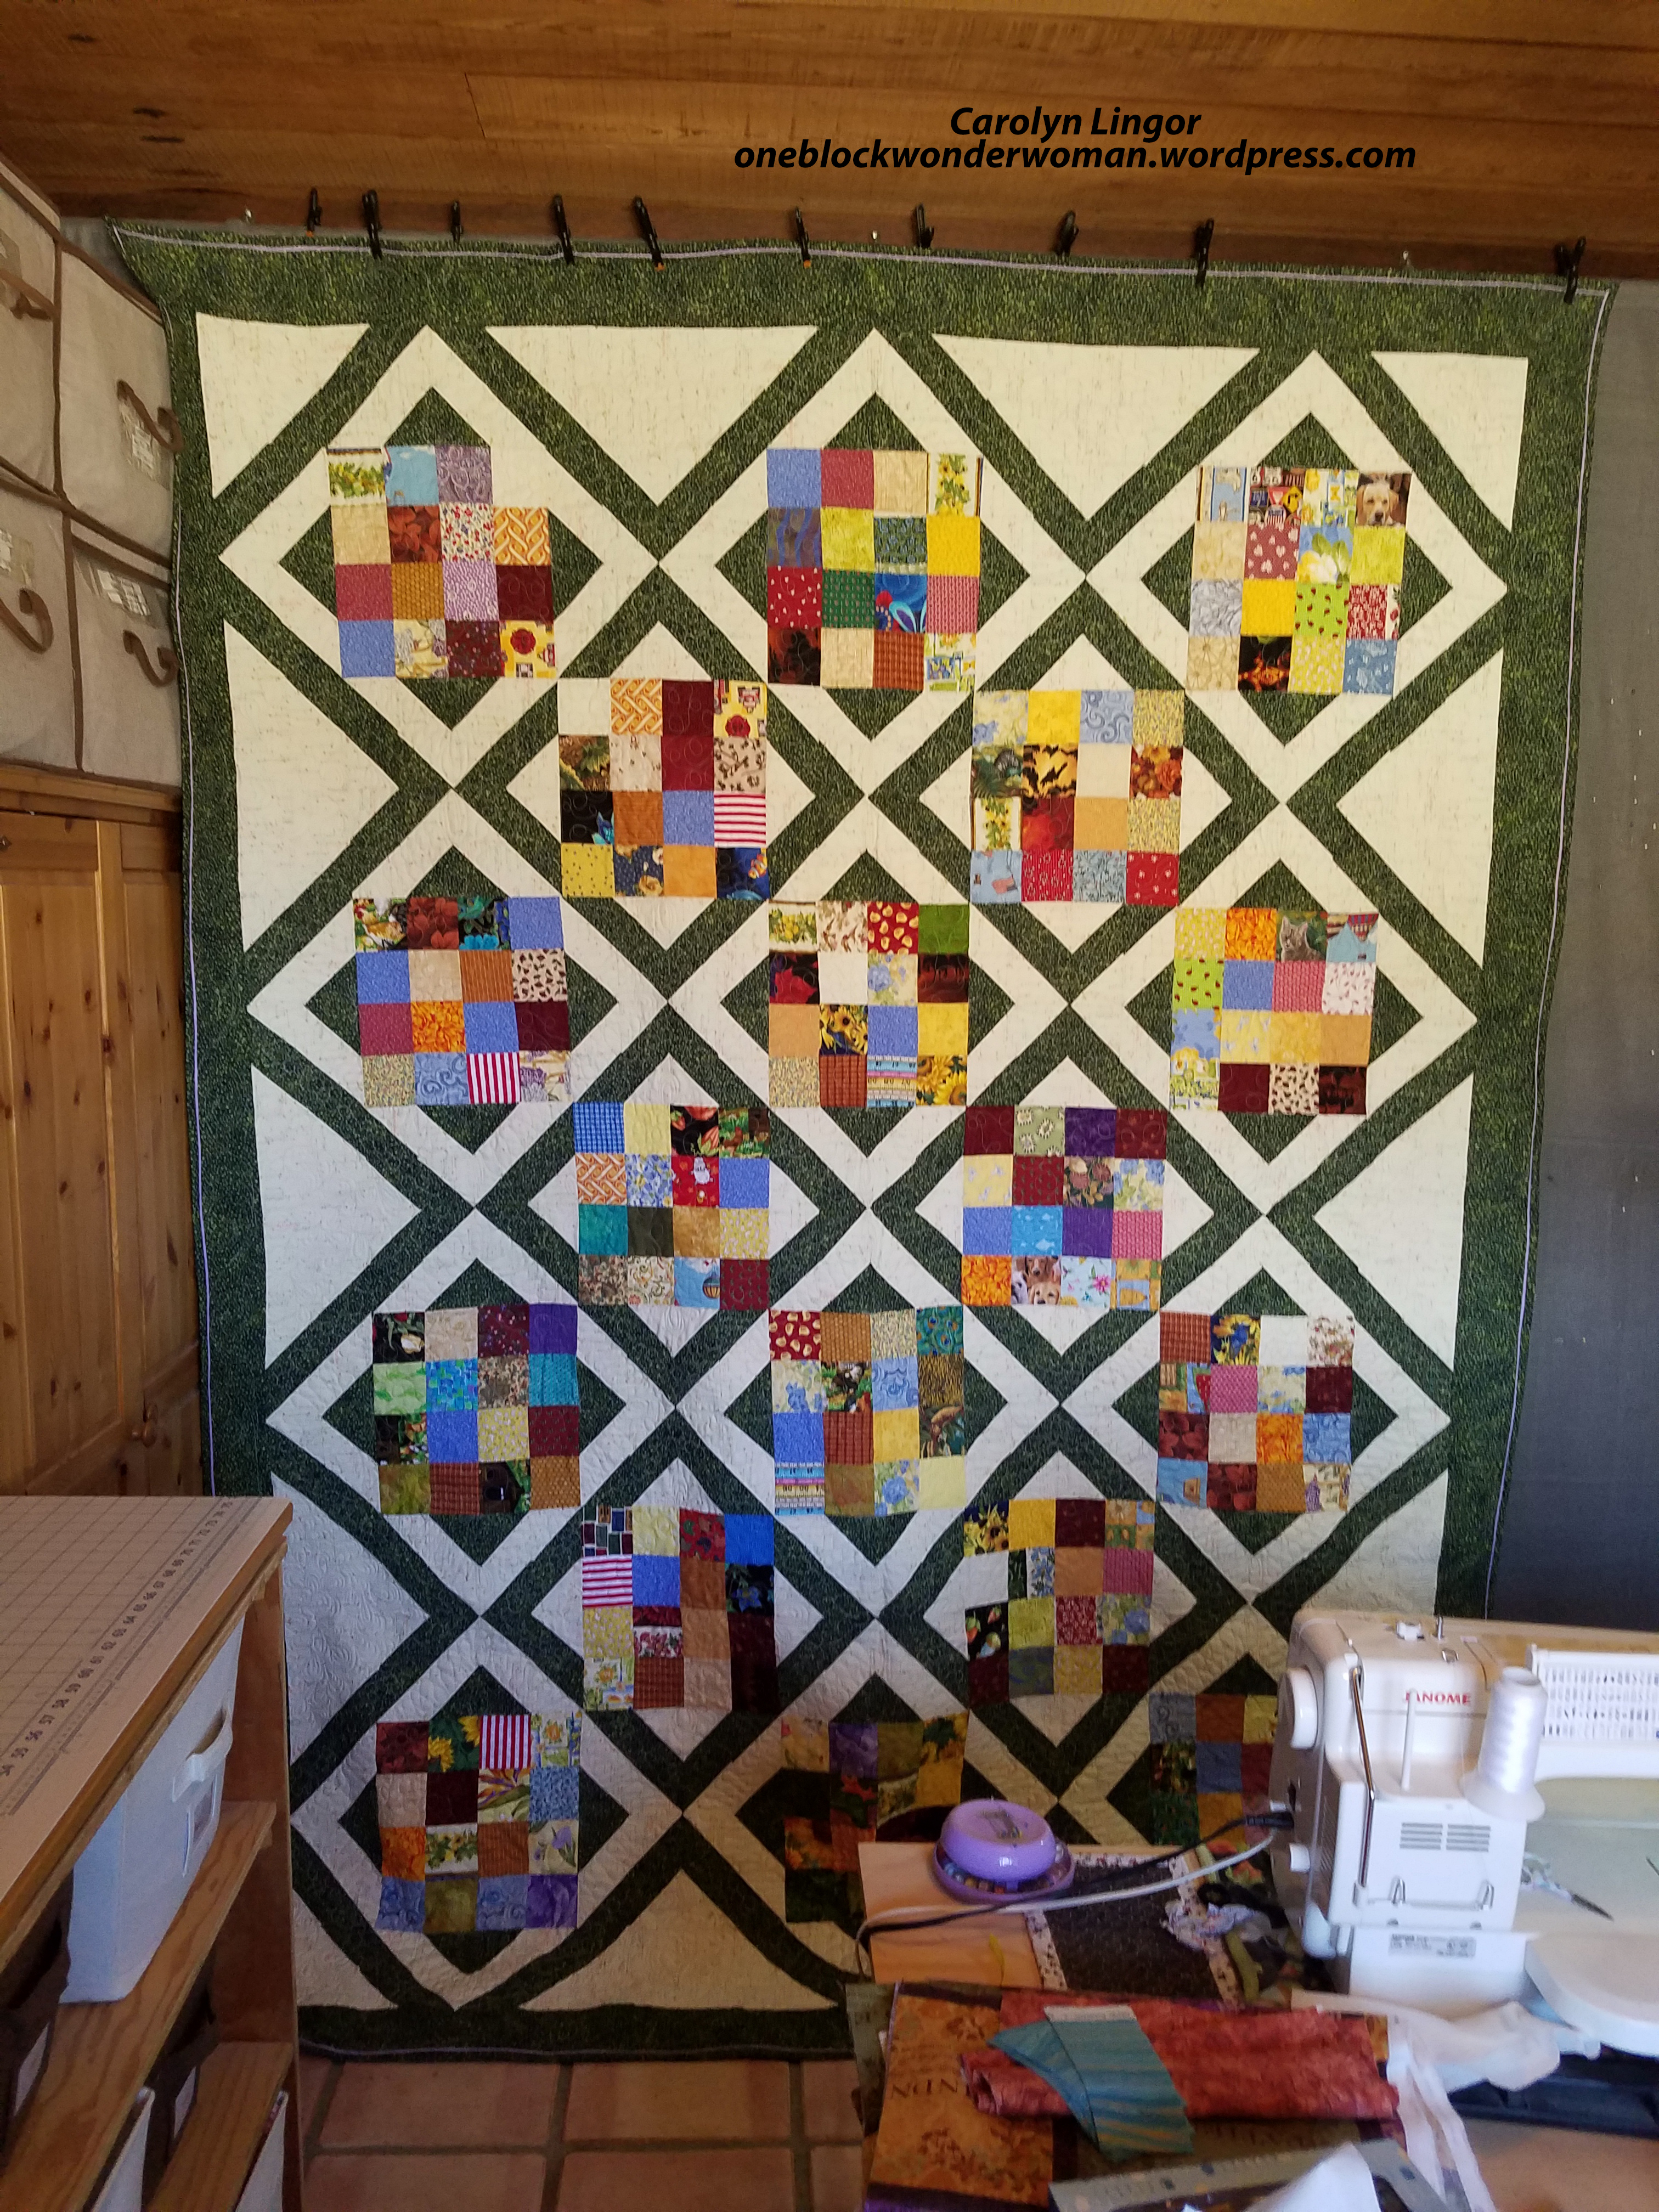
I also wanted to include a photo of a quilt I finished at the end of October.  I had started it at my quilt guild’s retreat last November as you may recall.  I am so happy with the way it turned out.

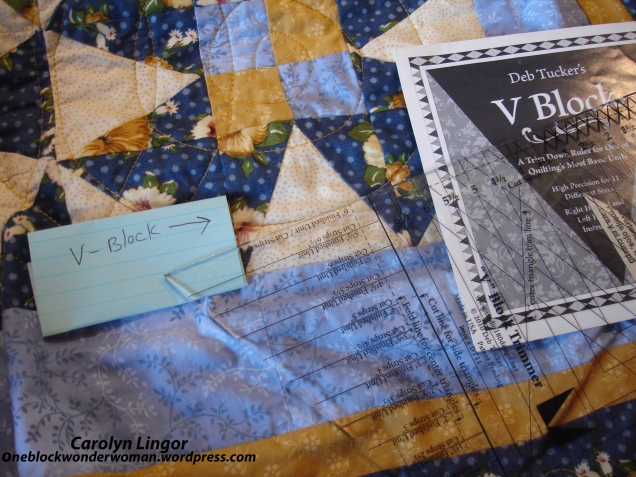
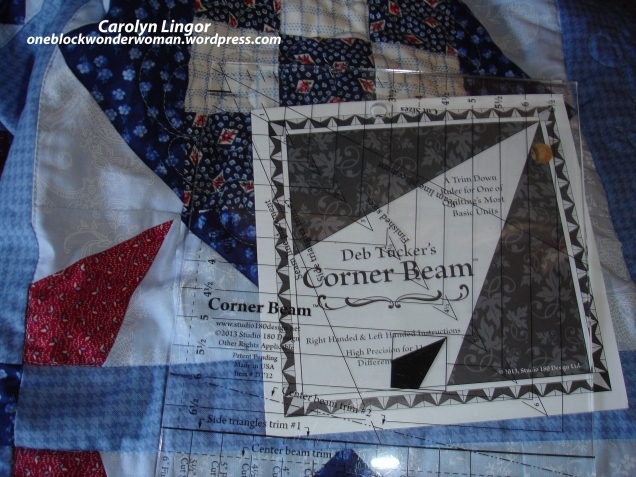
It is Linda Rink’s pattern called El Camino Real.  Each block is dedicated to one of the early California missions and since we live in a replica of a mission, I thought it was very appropriate.  I am calling it “Oh, My Stars!”  You will notice I used my pieced border technique as described above to make this one fit.  It took me about 9 hours to quilt this on Greta, my longarm machine.  I also spent about 9 hours just staring at it trying to decide how to quilt each block.  Here is some of the detail while it was still in the quilting process.  If you click on the photo, it will enlarge so you can see better detail.

As you can see, I did a lot of ruler work, which is very time consuming.

I will most likely be spending Thanksgiving Day getting the camping quilt ready for quilting.  We don’t have any nearby family and really don’t like to travel on holidays.  I am also working on a baby quilt, experimenting with the trapunto technique for the first time.  I love how it is coming out, but it is top secret for now.  And I have done several quilts to donate to various causes and people in our community who have gone through some tough times.  I will share some of that next time.

I have so much to be thankful for.  No catastrophic wildfires in our immediate region this year, although several people we know have lost everything in the Paradise fire.  It is raining.  I have good health, a lovely home, precious friends and family, a fabulous church, the most wonderful husband in the world, and Jesus as my Savior.  Hope you all have a wonderful and thankful holiday.

Deadlines Here, Deadlines There, Deadlines Everywhere

There is a reason why they call them deadlines.  By the time you cross the line, you are so tired you feel dead for a few days afterwards.  I have had so many quilt to get finished in a short period of time that I don’t know whether I am coming or going.  The good news is I only have one more to complete to be done with deadlines for awhile and I have all the way until the first Wednesday in September to get it done.  Heavy sigh.

So here is what I have been working on.  As you may remember, every year I raffle off a made to order custom quilt with all proceeds going to support my church’s youth group going to winter camp.  This year’s winner very generously gave her win to another member of our church who wanted to win in the worst way.   The only guidelines she gave me was queen size, black background and pink and white hearts.  Here is the design I came up with.

My Quilter’s Support Staff (husband Rich) came up with the idea to have the hearts cascading into some sort of a garden.  I had originally envisioned having them melting into a puddle of pink.  Well, it seemed like a good idea at the time.  I was blessed to find this garden fabric available in yardage.  Usually this type of pattern is only found in panels which would have been a big challenge to make seamless.  I was able to put fusible on the back and meticulously cut out the parts that I wanted to leave in.  Everything is fused and machine appliqued on which on the garden portion was really difficult with all the tiny details that I wanted spilling over into the black.  I embroidered a cross on the largest heart in the upper left corner and named the quilt “Love Came Down”.  I don’t know if you can tell, but the black background has sparkly stars all over.  I just love the way this one came out and it was hard to let it go to its new home.  The lady who got it also loves it.  I finished it up near the end of March.

In April, as I posted in my last post ( https://oneblockwonderwoman.wordpress.com/2018/06/22/our-most-excellent-quilting-adventure-2018-version/), my sister-in-law Mary from http://stitchinggrandma.wordpress.com was coming to learn some tips on longarm quilting and to quilt her humongous king sized quilt on my new longarm, Greta.  So that meant catching up on months of neglected housework to make the house presentable for company.  It was worth it.  We had a great time.

As soon as Mary left, I had to get ready for the annual Dutch Oven Cookoff, which is a huge fundraiser for our little rural life and local history museum.  There are usually over 150 dutch ovens going with cooks coming from as far away as Oregon and Arizona.  The organizers also arrange for demonstrations of many old time skills, such as gold panning and blacksmithing.  I am in charge of the quilting demonstration.  Last year I came up with the idea of having a hands on experience where everyone who made a block got a chance to win the resulting quilt which I would complete. So that involves a lot of prep work, pre-cutting scraps and making half square triangles and such to make it easy for beginners. Mary helped me with a bit of that before she left.  Also, my Quilter’s Support Staff made a great sign to guide people to where we were having the demonstration.

The great thing about this year’s event is I had a third helper, whose husband is one of the blacksmiths, who found out about the quilting demonstration through him.  She got ahold of the organizers to volunteer her help, and it turns out she is a member of my quilt guild.  She doesn’t attend meetings because she lives about 3 hours away, but I had met her at the guild retreats.  The other great thing is we had a perfect setup inside a newly built add on to the tiny cabin that has been on the property for years.  No more dust clogging up sewing machines, wind blowing quilt squares off the design wall, or tables and chairs sliding down the slope where we were located.  Here is a photo of the wonderful setup we had.

The pattern I chose is Confetti Crossings out of The Big Book of Scrappy Quilts.  This is what the final quilt was supposed to look like with a solid border added around the edge.  I though it looked unfinished and a bit odd….so…..

…I added my own finishing touch to it, which meant I had to do a lot of figuring and…gasp….math!  But I love the results.

The winner was another quilter, and she was thrilled with the final quilt.  Thank you M’Liz and Delani for your able assistance.  You are both a godsend.

The next series of deadlines came at about the same time.  First, one of the elders and founding members of our church decided he and his wife needed to move closer to their grandchildren down in San Diego.  So the pastor asked me to make a memory quilt for them quite quickly because, even though they had already moved, they were coming back for our annual church BBQ and swim party.  Also one of the couples in our church who take in foster children and have been waiting to have a child or two that they could adopt were informed that they would be getting their dream, that a brother and sister were available for adoption.  Of course, I had to make quilts to welcome them to their forever home, and only had two weeks to do it in.  The boy is about 7 and his sister is 3.  Fortunately, I had taken a class and started a quilt utilizing free-form quilting with Sujata Shah.  She calls this pattern Peppermint Pinwheels.  Since I already had several blocks made, I was able to finish it in time.  I call this quilt Dreaming on Daisies.

And for the brother’s quilt, I resorted to my go-to, quick to make quilt pattern, Labyrinth by Debbie Maddy of Calico Carriage Designs. I can cut and sew this quilt top in one day. The pattern calls for a star in the center, but I just had to use this adorable square of a cowboy on his horse holding his dog in his lap.  I called it Best Friends.

 The quilts were waiting on the beds for the children when they got home and were a surprise for the parents-to-be as well (the adoption won’t be final for 6 months.)  Fortunately, my friend and fellow quilter Delani, was asked to prepare the beds for the kids, so she was able to smuggle them into the house.

And here is the memory quilt for the elder and his wife that I also was able to finish on time.

The really great thing about all these quilts is nearly every piece came out of my stash or scrap bins.  So why are both still overflowing?  Maybe it was the local quilt shop that had a going out of business sale, which of course I went to…twice.  I picked out a lot of great things, including a couple of nifty panels, which have become a new passion for me.  My Quilter’s Support Staff came into the store to use the restroom while I was at the cutting table, and after he took care of business he wandered over.  He kept saying things like, “You’re only getting 3 yards of that?  You should get more.  It’s a great deal.  Did you see that panel over there?  Isn’t that great?  You should buy 2 while you have the chance.”  Being the submissive wife I am, of course I had to go along with him.  Hahaha!   So maybe that does have a bit to do with the overflowing stash.

The last looming deadline that I will post on today was the annual Quilt Guild Challenge.  This year’s theme was any quilted item that fit things that Old McDonald would have on his farm and the deadline was the second Monday in August, which was yesterday.  I had in mind what I wanted to do, but it kind of grew to more than I ever imagined at first.  I finally got started about two weeks ago.   I started with the center panel, which I just happened to win at last year’s guild quilt retreat.  I also just happened to have the framed scenes on the side and the wood look background fabric.  That was going to be it, but then I had an IDEA!  Here is the finished quilt.

Why not put a chair next to the window to make it look like you are inside a cabin looking out.  Then I thought, wouldn’t it be a great idea to include a lantern, so in the upper right hand corner you can see the lantern that I made on my embroidery machine and stitched directly onto the background.  The QSS thought I needed a little something down in the right-hand corner, so if you click on the photo to enlarge it, you will see an embroidered mouse in a mouse hole.  Now the chair was another story.  I do not have the talent to look at a chair and draw it out in proper perspective, but my Quilter’s Support Staff does.  So I brought a similar chair to what I wanted and placed it next to the design wall where I wanted it, then got Rich and said, “Can you draw that out?”  Of course, he did.  He pulled out a letter sized sheet of paper and sketched it free-hand and then I got him a big sheet of unused newsprint paper and he translated his original drawing to the size you see on the quilt, all freehand.  He is simply amazing.  I could never do that.  Then I turned the big sketch over and traced out a mirror image that I could use to transfer to my fusible.  Now, tracing, that I can do!  This project was surprisingly a lot of work.  When I pieced in the “framed photos”, I worked really hard to get the lines of the wood fabric all lined up so it looked like a real wood wall.  Then I spent nearly 7 hours of actual stitching time on Greta, the longarm.  The quilting really came out great, but sadly, you can’t even see most of it unless the quilt is laying flat.  I traced around most of the larger objects in the “window” and added some texture stitching to the grass, and did a lot of pebbles in the tree tops.  I stitched down the lines between the boards on the wall to give it some more dimension.  It also meant 6 or 7 thread color changes!  So I won second prize at the challenge last night.  The competition was hot and heavy.  There were a total of 12 terrific entries, and I got beat out by VEGETABLES of all things!!!   Seriously, though, that quilter deserved her prize.

Now the last deadline looms.  After that one is done, I am going to take a month off of actual sewing and finish up my scrap organization project that I started in January.  Making all these quilts made me realize all over again how wonderful it would be to be able to put my hands on exactly the size and color of scrap that I need.  Onward!

Happy quilting.


Our Most Excellent Quilting Adventure, 2018 Version

Sadly, it was not a quilting cruise, although that is definitely on my bucket list some day.  Instead, I received a call from my sister-in-law, Mary Deeter of   https://stitchinggrandma.wordpress.com/

She was excited about being able to go on a cruise with her younger sister that was leaving out of and arriving back into the Port of San Pedro in the greater Los Angeles area in April, and since it was only a 4 hour drive each way, she wanted to know if we would be okay coming down and getting her and driving her to our house for a nice visit…and of course some serious quilting.  She especially wanted some guidance on working with a longarm, and since I’ve been longarming for nearly 4 years, it seemed like a good opportunity to take advantage of that experience.  Of course, we were thrilled to host her in our home.  It has been years since she was last here and she and her husband were only able to stay one or two nights. Little did she know that I was in the market for a new longarm, and shortly after we made the arrangements, I purchased a brand new Gammill. (See my last post about the Quilting Fairy Makes a Visit).
Since it is such a long drive for us, she offered to put us up in a hotel overnight, otherwise we would spend 8 to ten hours on the road in one day.  Then she surprised us by offering accommodations at the Queen Mary, which has been nicely restored to it’s original charm with added modern amenities.  Here is a photo of the corridor leading to the rooms.

It’s difficult to tell, but every so often, there are short hallways leading off to the right and left which lead to the doors to two staterooms.

This is a view of part of our stateroom looking towards the entry door, which is just on the other side of the double door hanging closet on the right side.  You can see the closet door handles sticking out a bit from the closet.  I was truly impressed with the amount of storage that was in the room.  Like I said, there was the double door hanging closet, an alcove just to the left of the bathroom entrance (at the far end of the photo) that has a dressing table complete with drawers, the other dressing table on the left that has the little stool partially pulled out that also has a white cupboard on either side of it going nearly to the ceiling.  The really narrow piece of built-in furniture on the left is actually a desk.  It has a flap hanging down that pulls up and locks in place for a writing surface, and a built-in stationary and ink well holder on top of the non-folding portion.  Then there are these nightstands on either side of the bed with more storage.  Note the marble tops, which was standard on all the built-in furniture.

Then there are cubbies above the bed that you can see in this photo looking to the left as you come in the entry door. Note that we had 2 portholes!

The last photo inside the stateroom is of a mysterious piece of furniture that we decided must be a heater.

We were quite comfortable, but wished we would have allowed more time to explore the rest of the ship, but we had a VIP guest to pick up and a lot of important quilting to do, not to mention a long drive home.

On the drive home, typical of Los Angeles metro area traffic, we were reminded of why we were so eager to retire to a less populated area of the country.  The freeway came to a dead stop, and by carefully rubbernecking, I was able to get this shot of a police officer standing in the freeway lane talking to a man (look just under the mirror of the van in the “fast” lane).  They stayed there talking and gesturing for quite awhile, then the police officer drove off and released the tie up.  The man had a bucket with him and hopped on up to the top of the arch.

Never found out what that was all about, but were we glad to once again escape from L.A. and return to our refuge out in the country on California’s scenic central coast.  Here is a photo of Mary and my Quilter’s Support Staff, my wonderful husband Rich, visiting in my cozy quilting room. (Yes, to my dear buddy, Mona, she IS sitting at “your” sewing station.)

Mary had mailed her humongous king-sized quilt to my house before she had left on her cruise.  It is a pattern by Pat Sloan called Grandma’s Kitchen.  The next morning, we got ready to learn some of my favorite quilting stitches.  My machine only does hand-guided stitching, no fancy programming available, but that’s what I prefer because I find it more creative and an enriching challenge learning to coordinate what I see in my mind with my hands and the machine to actually make it come out on the quilt top.  Fortunately, I am the only one who can see what’s in my mind (scary thought) so no one but me knows if it came out right, and I’ll never tell.  After a morning of having Mary draw things out on paper and then drawing it again on a practice piece, Mary and I loaded the Leviathan onto the frame, and she got to work.

Everything went well until our last quilting day.  Mary was done with the quilt except the two last blocks and the borders, and a couple of filler pieces.  Then the dreaded out of bobbin moment came.  So I changed the bobbin and tested the tension on the excess at the side of the quilt like I do every time.  It was a mess, eyelashes everywhere, so I played with the tension on the upper thread and the bobbin.  I spent a good hour, and nothing worked.  I called tech support and talked to the technician.  I tried everything he suggested.  We then texted back and forth, and nothing worked.  It was so frustrating.  This is a brand new machine with maybe 5 hours of actual stitching time on it for crying out loud.  We talked about it and decided Mary would leave the quilt where it was and when I got things working again, I would finish it up and mail it back to her.

The next day, we drove her to the San Jose airport, and when I got home, out of frustration I called Holly from my quilt guild. She is a professional longarmer and had told me on numerous occasions that if I ever had any problems with my Gammill, to give her a call.  She has had hers for 10 years, and is very practiced on fixing almost anything that goes wrong.  Turns out, Gammill’s aren’t really fond of the King Tut by Superior threads that I have always used because it was the only thread my old longarm would accept.  Fortunately, I had some Omni by Superior, which Holly suggested I try, and working with that, I was able to finish up Mary’s quilt and get it mailed off.

The next day, I went back to the machine to quilt another quilt, and the tension was doing the same eyelash thing.   So I called Holly again, the next day, she drove the 25 miles to my house (the biggest advantage and disadvantage to living in the country is no one and nothing is close by).  She spent about 4 hours teaching me everything there is to know about Gammill’s and tension.   By the time she left, we were certain that everything was adjusted perfectly.   The next morning, I decided to do a bit more practice stitching to warm up while I had a practice sandwich still loaded, and it was eyelash city again!  “Hi, Holly, you probably never want to hear from me again..”  But no, she was wonderful.  She had told me previously that if the adjustments we had made didn’t work that she would come out and adjust something called a rocking finger on the machine.  So a couple of days later, she and her husband came out and spent a couple of more hours messing with my machine.  The rocking finger is located in the bobbin race and is circled in the photo below.

She explained that the purpose of the rocking finger is as the top thread comes down around the bobbin case, it causes the two threads to come together just so to make the stitch.  But if it is out of adjustment it doesn’t release the top thread on time and causes the stitch to just make a mess.  Evidently, we were able to use the King Tut thread early on because of the newness of the machine, but the more we used it, the tighter the rocking finger became.  So they adjusted it and now, with a couple of other adjustments that I can make to the way I thread the machine and changing the top tension a bit, I can still use the King Tut.  But it’s just not worth having to mess with those things to me, so I am going to stick with the Omni and use up my inventory of King Tut on my domestic machines.

Just a bit more.  One of the features I love about my Gammill, Greta, is the micro-stippling handles circled in the photo below.

They are closer together and closer to the work surface so give you much more control over your stitching.  When you want to use the regular handles, you can just pivot the micro-stippling ones up out of the way.  The only issue I have is that I have to bend over to see the detail of what I am stitching, and it kills my back.  Then I had a brilliant idea, even if I do say so myself.  When we first moved here, I thought my husband, Rich, would organize his garage (what was I thinking?) so I bought him a rolling stool with a hydraulic lift for the height of the stool.  

Since he can’t use it in his overstuffed garage, today he brought it in at my request.  I adjusted the seat height and now I can sit down and be at the perfect height to not have to bend to see what I am doing.  I can’t wait to try it out actually quilting!

Sorry for the long post.  There is a lot more to say, but I will have to save it for another day.  You can read more about Mary’s adventures at her blog from the link that I posted above.  Be sure to check it out.

Happy quilting.

I Have a Tool for That, Too


I am freshly back from my Quilt Guild’s annual retreat, fresh being a relative term since it’s been a couple of weeks.  Where does the time go?  The partial quilt in the photo is the project I decided to work on at the retreat.  It is a pattern from Nancy Rink called El Camino Real, each block being named after one of the California missions.  Since we live in a replica of a mission, I thought it would be an appropriate quilt to make for our home.

As you can see, the blocks are very intricate and each one is slightly different.  Nancy’s pattern calls for sewing a lot of little triangles onto other tiny triangles, but being the simple person I am, I always look for the simplest way to do things. So  I thought about all the tools I have in my arsenal, some of which I profiled in another recent post, and I remembered my Square in a Square tool designed by Jodi Barrows.

This is a wonderful tool.  All of the components you can make with it are simply made from squares and rectangles, with the exception of the Diamond in a Square and related shapes.  You can see in the photo a bit of two of the prototype components I made that are incorporated into the blocks.

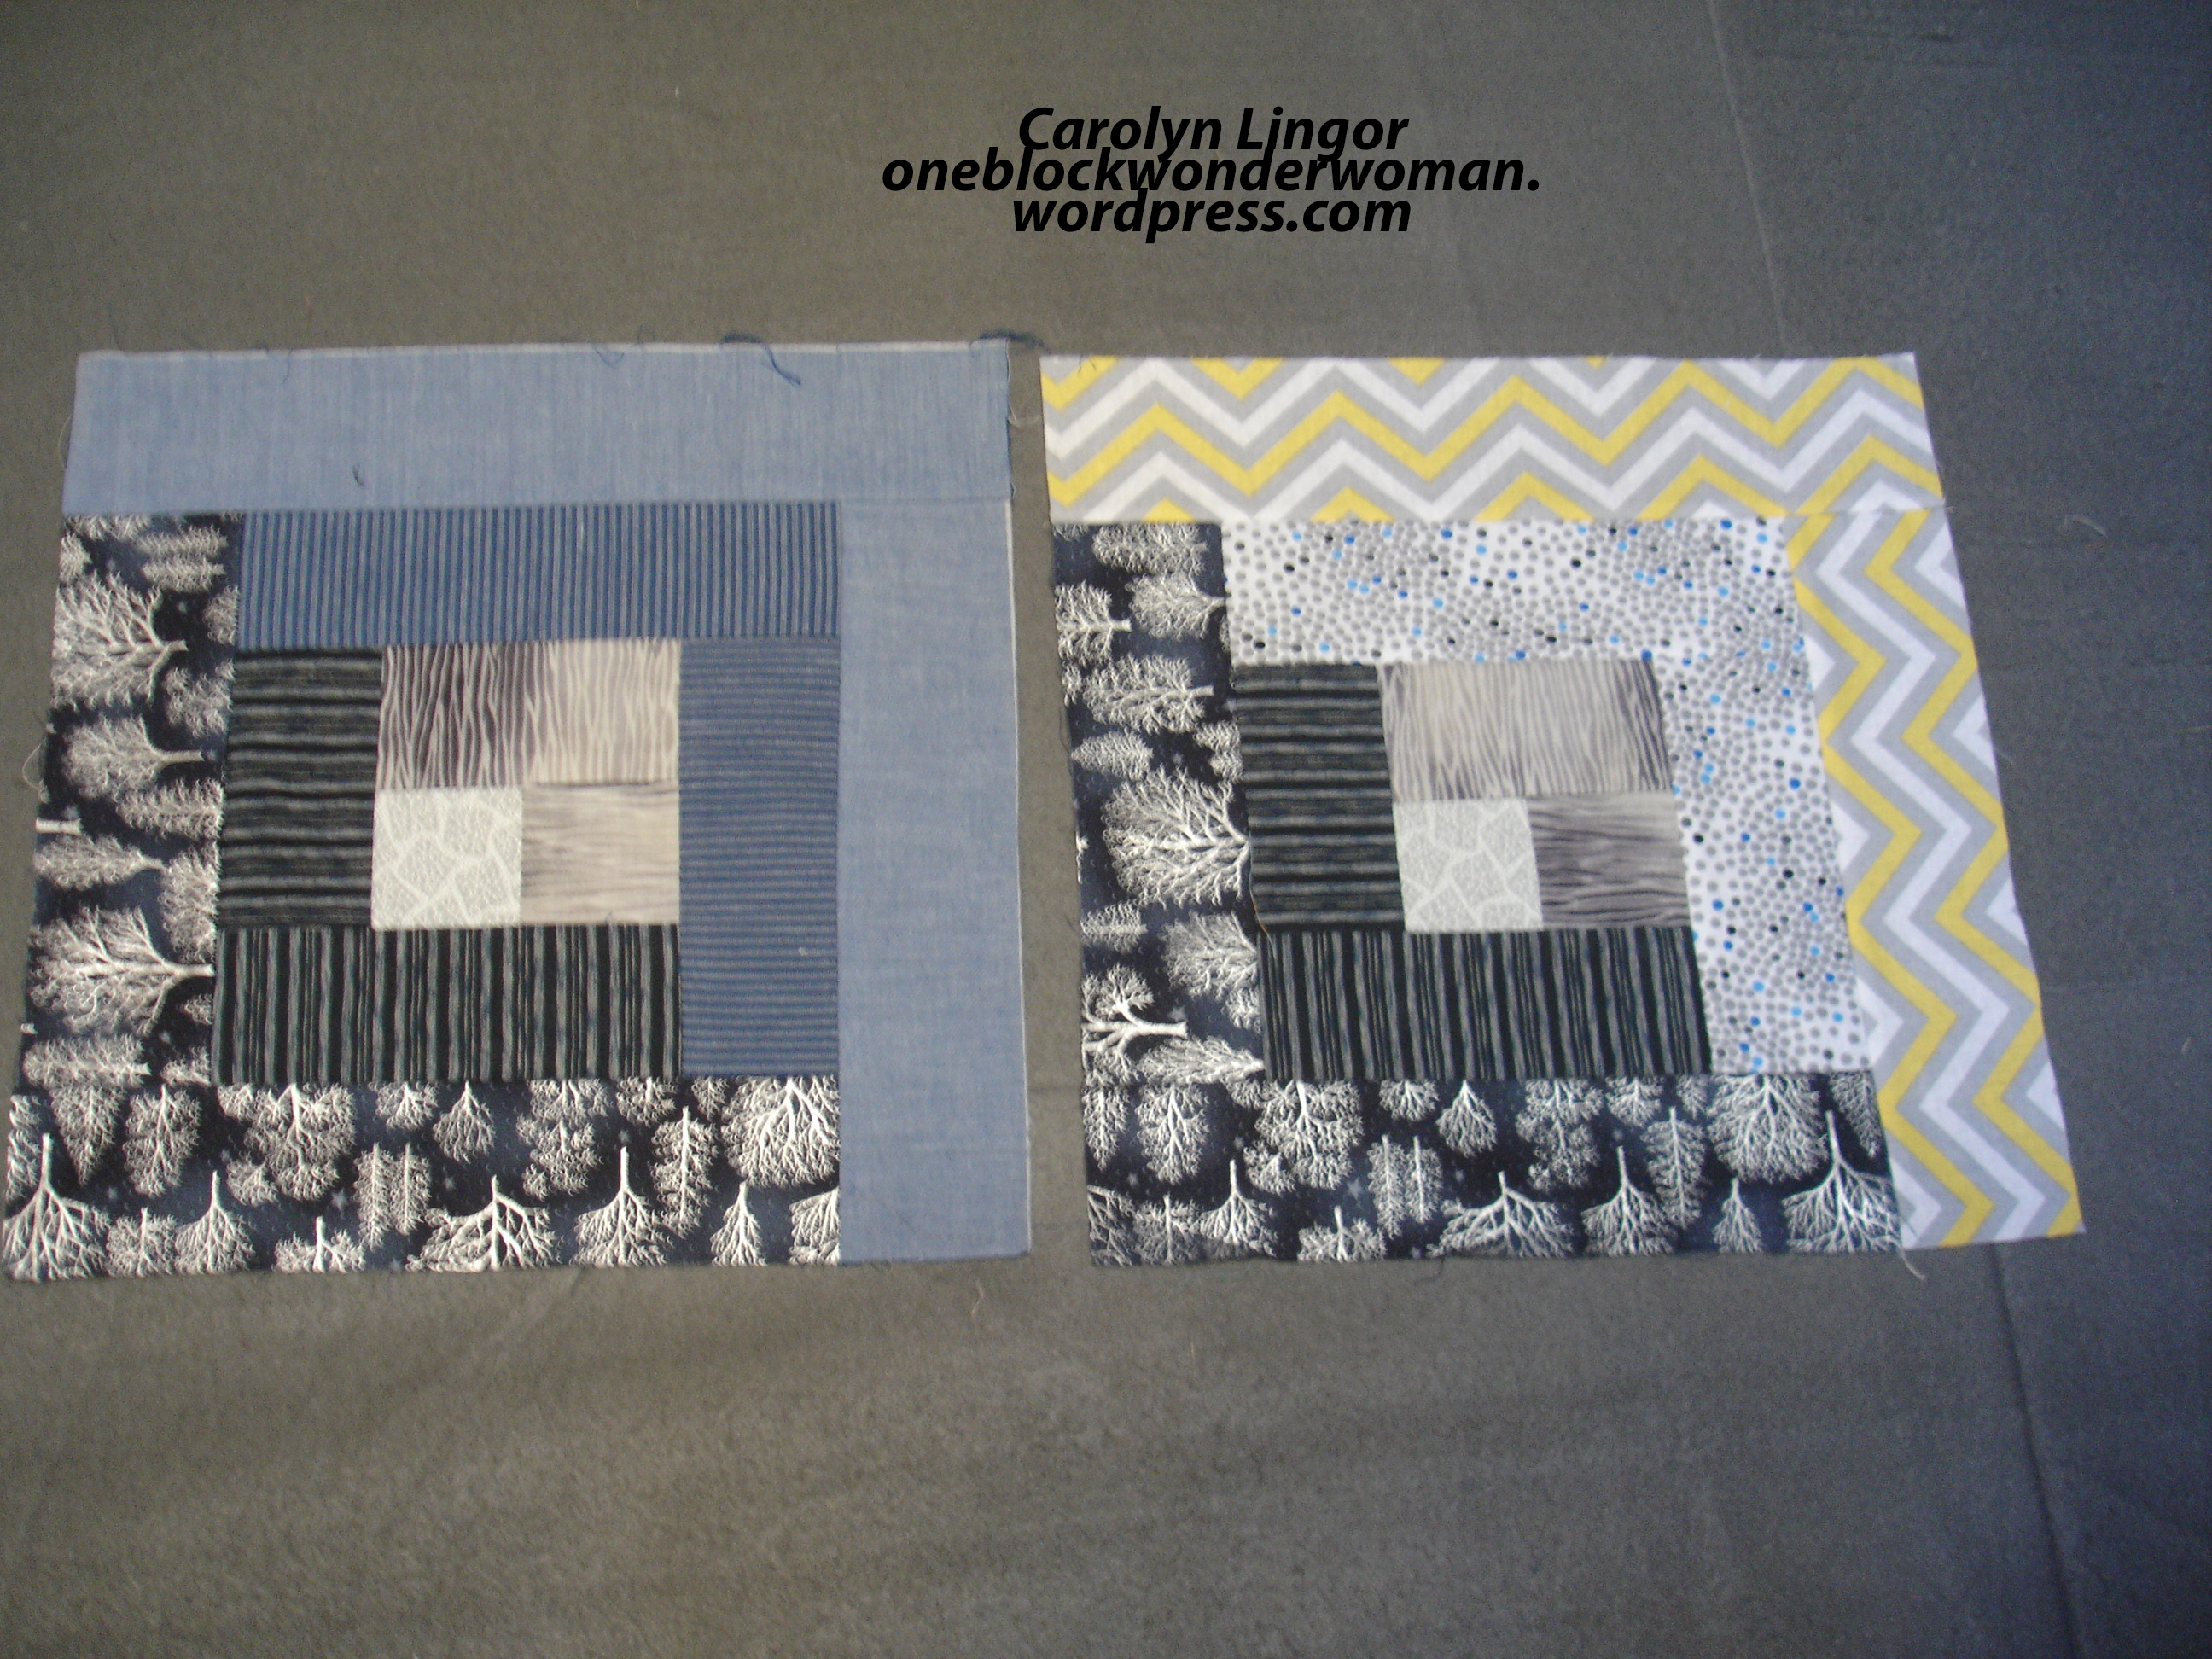
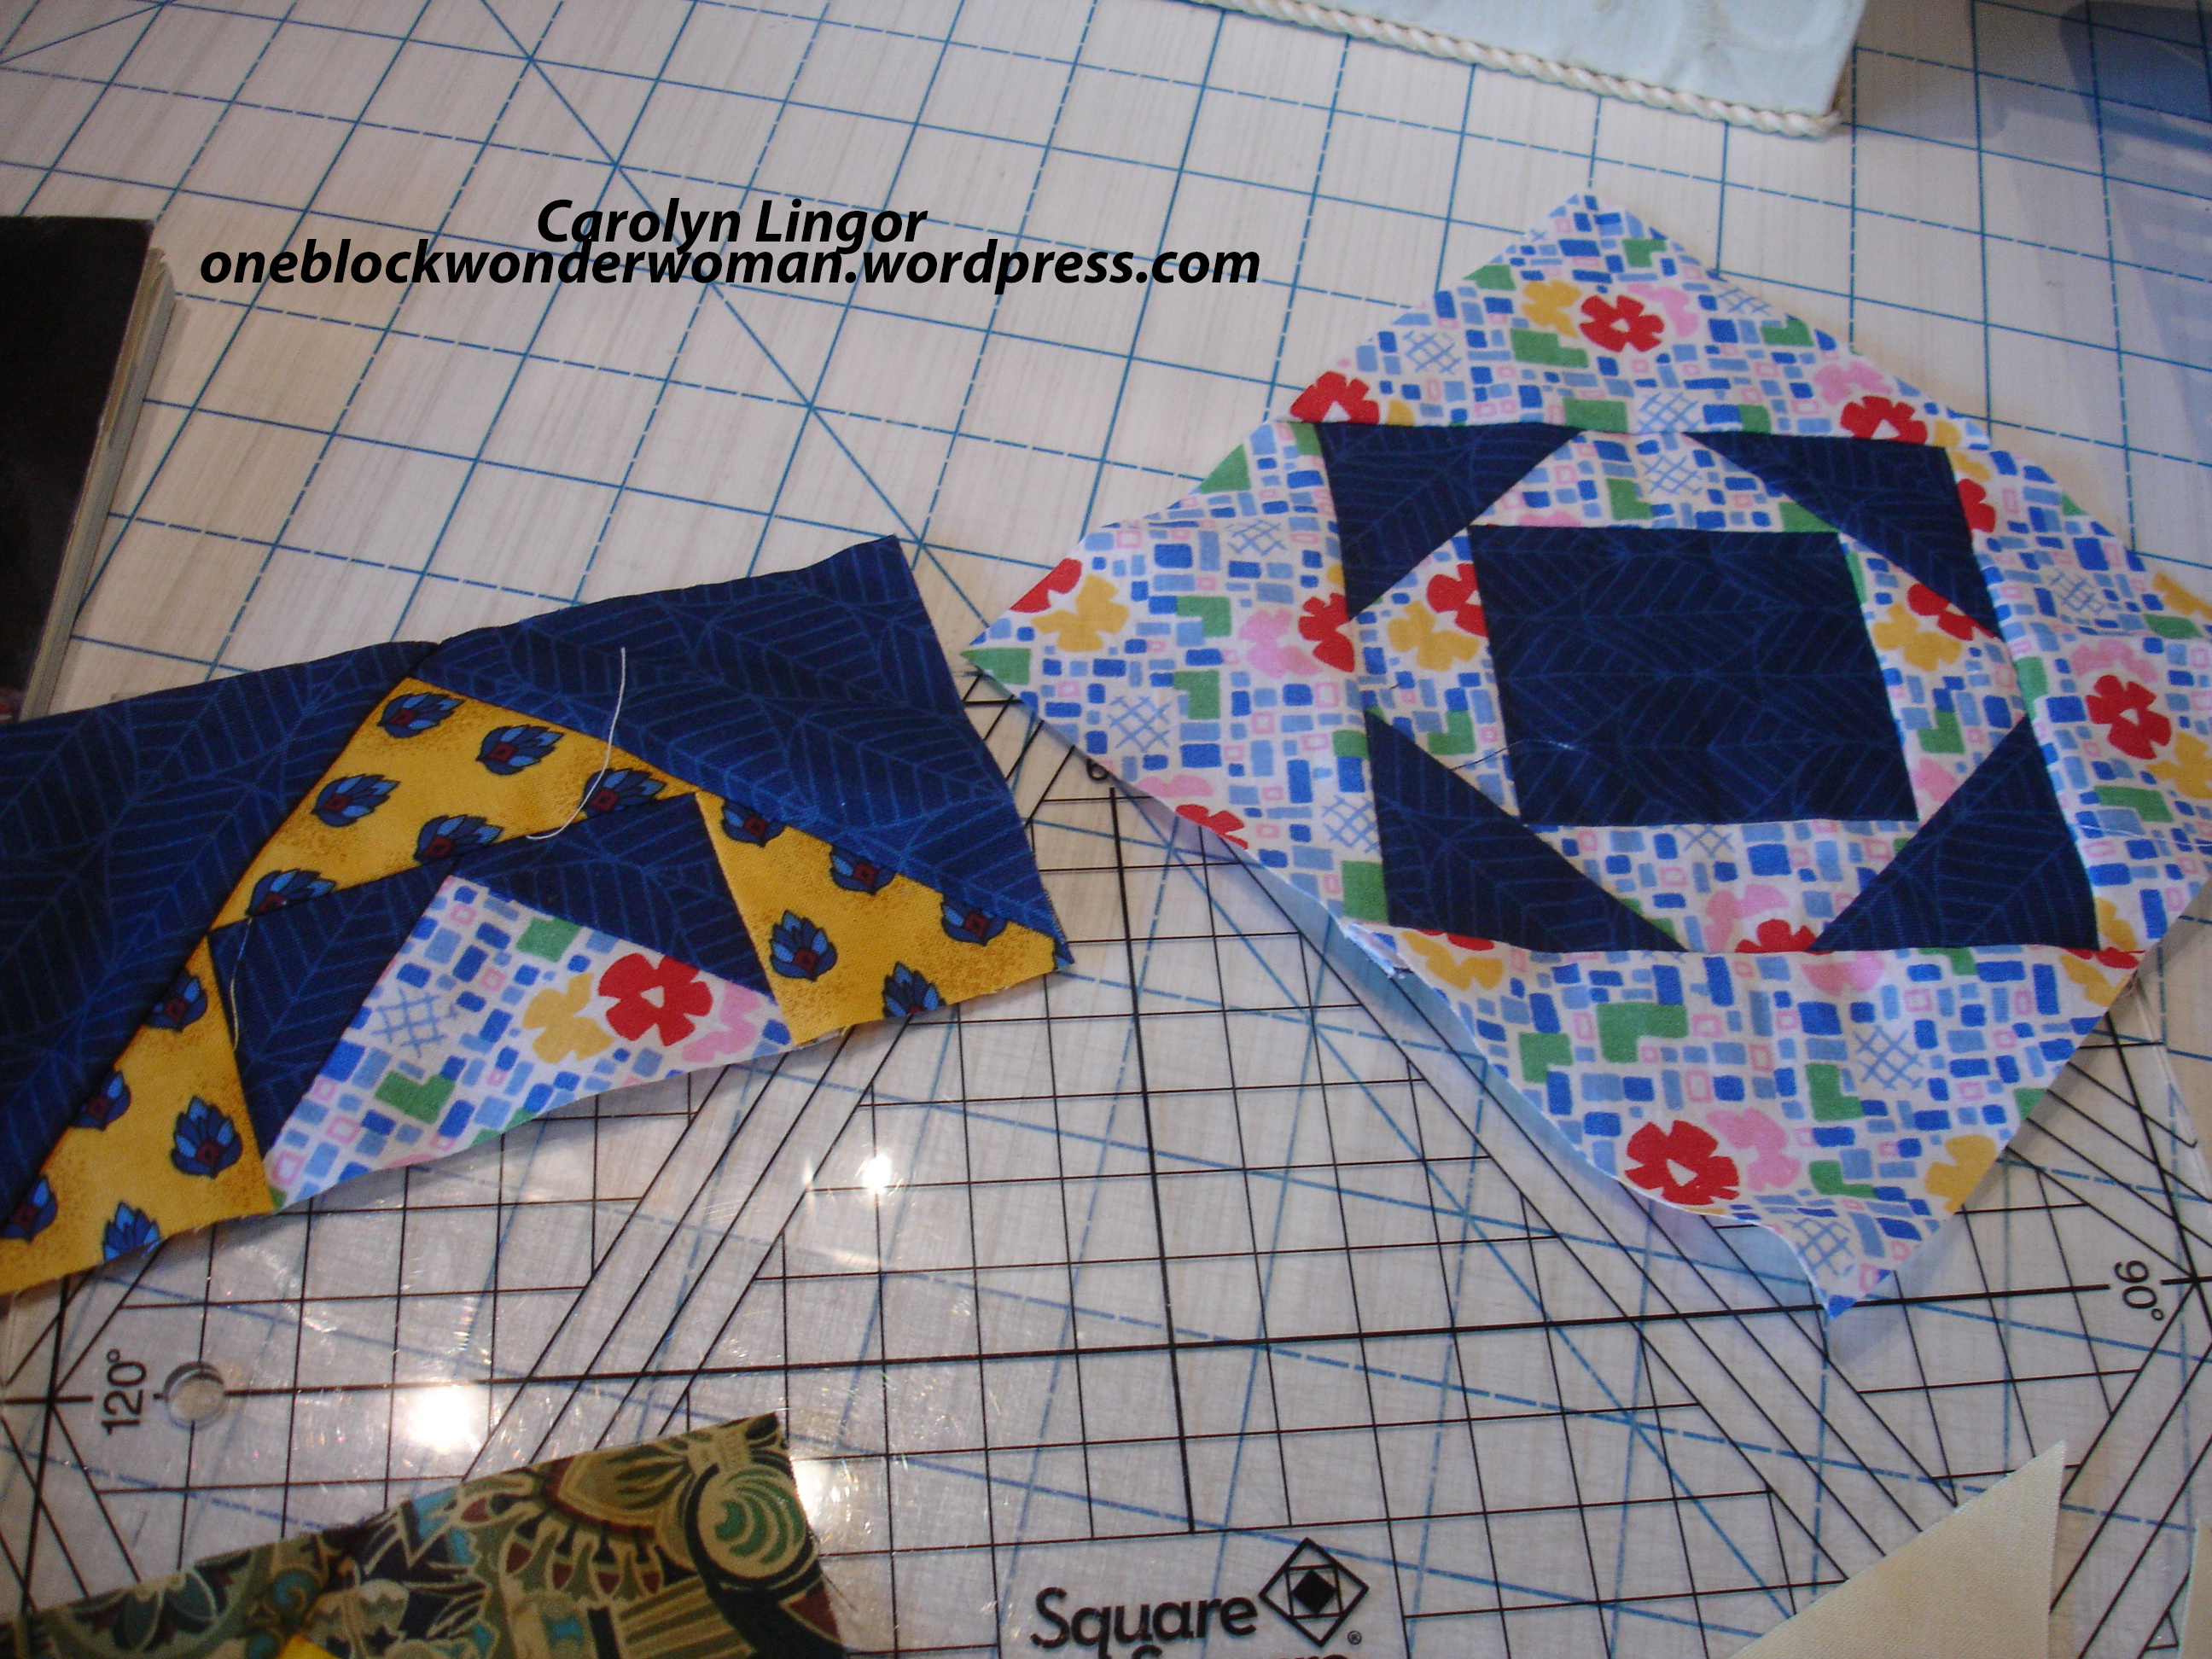
The component on the left starts out similar to the piece on the right.  I got the colors in the wrong order on the piece in the right, which is why I always make a prototype and use scrap fabric when trying something new.  The flowered fabric should have been the square in the middle.  To do the technique, you start with a square in the middle, add the right size rectangles on all four sides, cut with the Square in a Square ruler as instructed in the book (in this case on a 90 degree angle), then add one more round of properly sized rectangles trimmed up after sewing as instructed.  Then when you cut the piece on the diagonal, you get two of the components on the left. I did have to add the large dark blue triangles, but it was a lot easier and a nicer result than doing the triangle thing through out and it is more accurately sized than I can get by flip and stitch techniques.

This is another component that I had to make.  As you can see, it is just as simple using the Square in a Square system.  Once again, I had to add the final triangles, but I was able to make four components more easily and more accurately than if I had done it the old fashioned way.

There are a lot of other components that I made using this system.  Jodi’s book is full of photos of how the different options look once completed, so I simply had to page through and pick the one I needed.

Another tool that I used in this quilt for piecing the center portions of the applique blocks is the Corner Pop tool from Deb Tucker.

This is only the second time I had an opportunity to use this tool, and it worked like a dream.  Instead of doing the flip and stitch technique, which as I say, I have a terrible time getting proper alignment and accurate seams and enough seam allowance where the pieces intersect, following Deb’s sizing instructions, you cut the corner off the main piece of fabric, then sew on slightly oversized triangles, then trim the piece down to the right size using this tool. As shown here.

As you can see, the results are perfect.  No crooked corners.

And plenty of seam allowance so you don’t cut off your corners when incorporating it into the block.

One of the other quilters at the retreat was so impressed by the Square in a Square tool that after borrowing mine to make some tiny components that was taking her forever, she immediately ordered one for herself.  If you do order one, be aware that the booklet that comes with it doesn’t have the instructions for all the possible options, so be sure to order Volume 1 of Jodi’s Technique Reference Book.  It is well worth the additional investment.  Volume 2 of the Reference Book focuses exclusively on the Diamond in a Square option and all the different options you can make with it.  I also highly recommend you practice making the component you want with scrap fabric to make sure it comes out the right size and you get everything in the right order without wasting that perfect fabric that you have for your quilt.

My usual disclaimer, I have no financial or other interest in any of the tools I talk about.  I simply like to share easier ways to do things with my fellow quilters.

Now, I’d better get back to making little teeny applique pieces for the rest of the applique blocks.  Heavy sigh.

Update on No Paper-piecing Mariner’s Compass

compass labeled

In my previous post, “I Have a Tool For That!”, found here: https://oneblockwonderwoman.wordpress.com/2017/09/01/i-have-a-tool-for-that/ I promised that I would update you on how well, or badly, things went.  And the report is that it went well.  The only problems I had in making my Mariner’s Compass prototype block were all due to operator error, the major one being that at the very beginning, I tried to skip from Step 1 to Step 3, so the Step 3 directions simply didn’t make sense.  It always pays to read carefully, but I tend to skim.  I don’t know why I do that, especially when learning a totally new tool.  Once I went back and read all the directions, everything went together fairly smoothly.  I had a bit of a challenge getting everything lined up perfectly when sewing components together, but after ripping and resewing one set of components (The developer of the tool calls them pies and kites, because those are the shapes they end up being) four times, I finally figured out how much of the little extra tips to leave on the top and bottom of the seams joining them together.  If you don’t get this step right, the edges are uneven and everything ends up looking tweaked.  Here is the resulting “base” unit that I made.

Mariner's Compass base

As you can see from the photo, when this base is assembled, it leaves a hole in the center, the idea being you either applique or reverse applique a circle on that spot, then you applique or reverse applique your finished piece onto a square piece of fabric.  The tool and instruction booklet come with handy template guides for both of these steps.

The next step was to figure out what I wanted to put in the center.  I auditioned several different fabrics that would look good fussy cut, but nothing seemed just right.  So I went to the internet and searched photos of Mariner’s Compasses for ideas.  I saw several that had a smaller Mariner’s Compass in the center that I thought was very attractive.  But if I did that, I would end up with the same hole in the middle, only smaller.  Then inspiration struck!  I have a tool for that!  I have an embroidery machine and a computer program to customize embroidery to size or whatever else I desire.  So I went back to the internet and purchased a Mariner’s Compass digitized design from embroiderydesigns.com.  Then I experimented with resizing on the computer and stitched out a test piece.  The colors and size on the first one came out all wrong, so I resized again and tried different thread colors, and the second one came out perfectly.  Here is a photo of the center piece readied for applique.

Center

And this is a photo of the two pieces pinned together.

Nearly complete

I think this is going to be a lot of fun.  My goal this year has been to add more machine embroidery to some of my quilts.  I have the tools, which weren’t inexpensive, and I should try to get maximum use out of them.  In the past, I’ve pretty much only used my embroidery tools to do labels.

I think this first attempt is going to make a lovely pillow.  Or maybe I’ll save it and do some more compasses and make a quilt out of it.  The website to get the Mariner’s Compass ruler and to watch Robin’s tutorial is http://robinruthdesign.com/

Speaking of embroidery, that is the theme of this year’s quilt show next Friday at the Hall, so there will be all types of embroidery on display along with quilts, and embroidered quilts.  At the beginning of the year, our Guild was blessed to have a speaker/instructor, Leora Raikin, come and teach a class on African Folklore Embroidery.  Her website is: http://www.aflembroidery.com/

It was a lot of fun learning her method of hand embroidery, and her kits have hand-dyed embroidery floss made in South Africa by women who make their living by making the floss.  It is beautiful stuff.  So one of the things that is going to be on display at the Hall quilt show is some of the embroidery work done by women who took the class.

Here is the pillow I made from one of Leora’s kits.

Elephant Pillow

That’s all the news from the Central Coast of California for now.  Praying for all the people that are battling wildfires as well as those who are having to deal with Hurricane Irma and are trying to recover from Harvey.


Learning to say no….or maybe not.

For the first six months of this year, I didn’t spend more than a handful of hours working on any quilts that I wanted to make for my own selfish reasons.  Instead, I made quilts for fundraisers or for other people.  This, along with my usual life responsibilities, has kept me so busy, I haven’t even had much time to blog, which I really have missed.  So alert the presses…this is my second blog in less than a week’s time.

Don’t get me wrong, one of the major joys in my life is making quilts to minister to other people by sharing the gifts God has blessed me with, but I do tend to get in over my head.  I guess balance is something I need to continue to work on.  To paraphrase, sometimes you just need to stop and pet the fabric.  I have a lot of blogging catch up to do.  Here goes…deep breath.

The quilt at the beginning of this post was for the winner of last year’s custom quilt raffle that I do every year to support my church’s youth group going to snow camp.  We don’t want any child to not be able to go due to lack of finances.  Usually the raffle brings in around $2,000 and the lucky winner gets to pick any style, size, and general colors that they want, (assuming it’s within my skill level).  The winner of this quilt,  which I named Dancing Leaves, is a good friend and a member of my quilt guild, Valley Heritage Quilt Guild, which I affectionately call Quilter’s Anonymous.  Instead of having me start a quilt from scratch, she asked me if I would be willing to do a log cabin quilt for her, so of course, I said, “I can do that.  Log cabins are a breeze.  I’ll whip it out in no time.”  Silly me.  She then handed me a pack of fabric, and a pattern (Fall Foliage Spectacular by Judy Martin).  The pattern stitched out into a square, but did she want a square?  Of course not!  She wanted it to be a wall hanging to go in a specific spot and wanted it to be about 70 by 42 as I recall.  Then I noticed that instead of just being simple half-square triangles, the leaves were made from different length and width trapezoids, which I had never done before.  Of course, there were directions on how to make the trapezoids in the pattern book, but I couldn’t make them come out right after a dozen tries with scrap fabric, so being a puzzle-solver, I developed my own technique, which I’m sure someone else had already thought of, but was new to me.  Once that puzzle was solved, I got the blocks made, adding many of my own fabrics to give a better variety to the overall look.  I got a little carried away, putting in multiple shades of white and light yellow background fabric, realizing belatedly that Debbie had included a large piece of white that she had intended for me to use for all the background pieces.  Oops.

The next issue that I ran into was the two rows of leaves on the sides of the center medallion were supposed to be repeated on the top and the bottom as well, but then I would have to make the quilt way bigger than she had requested in order to make it the rectangular shape she wanted.  So I pulled out a bunch of quilt pattern books that I have, and I saw a border on one of the quilts that was very similar to the chevron shape I ended up using.  I thought to myself, “I have a tool for that!”  I got out my Strip Tube ruler and went to town, taking a lot of time figuring out the puzzle of how to transition around the corners.  It was rewarding to finally come up with the solution to the puzzle.  I would definitely make this pattern again.  It is really an unusual take on the log cabin.

Continuing on the theme of the yearly custom quilt raffle for my church’s youth group, I got a phone call from a lady that lives about 60 miles north of me who had somehow come across a flyer advertising the raffle.  She had started a log cabin quilt for her son’s dorm room just before he entered college, but she was really unhappy with the way it was coming out.  She wondered if I would be willing to fix and finish it for her…and, by the way…increase it from the twin size that she already had the blocks mostly done for to a queen size and she would pay me.  I told her I wouldn’t accept payment for myself, but she could make a donation to our church’s youth group, and I would help her out.  I now think I should have told her I would advise her on how to improve the quilt, but I wouldn’t finish it for her, but….So we met at the town half-way between where we both live, and I came home with her blocks and a lot of fabric and permission to do what I thought best to breathe some life into it and to take my time.  Which is a good thing.  That was in February, and I just finished the quilt this past Sunday afternoon.  The basic problem is she had almost no wow factor in her block and there wasn’t really a dark and a light side.  Looking at it, I decided it needed a little pop of color because it was sort of blah.  Here is a photo of her block on the left, and how I changed it on the right.

I only changed out two fabrics, but got the color that it needed.  I’ve found the hardest part when working on someone else’s quilt, is that not everyone is very accurate with the quarter inch seam, and most of hers were 3/8ths.   So I ended up having to adjust mine to match rather than taking all the blocks totally.  The photo doesn’t do justice to the color, even in a close up.  I entitled it “Sunshine and Shadows”

And the close up.

I found a receipt in the bag of batting she gave me to use which was dated 1998.  I confirmed that that was when she had started it!  No wonder she wasn’t in a hurry.  I will deliver it to her on Monday of next week.  Sure hope she approves.

Somewhere in between completing these two quilts, my friend Delani and I also made this comfort quilt for one of the elders of our church who nearly died because he lives on a remote ranch, and the ambulance couldn’t reach him and they couldn’t get a helicopter in, so he had to walk out to meet them.  Turns out he needed triple bypass and his gallbladder removed on top of a lung condition that he suffers from.  It’s a miracle he’s up and on the mend.  By the time we got the quilt made for him, he was able to come back to church.

He always wears cowboy boots, so we thought the boot border was appropriate. The pattern is Labyrinth by Calico Carriage Quilts.  I entitled this one “It’s a Bootiful Life”.

Back in May, it was time again for the Dutch Oven Cookoff, which raises money for a rural living and history museum just down the road a piece from us which is still in the development stage with one building up.  The movers and shakers want to put facades on the buildings to replicate the original little country town that used to be here in pioneer days.  For the second year, they asked if I would be willing to host a quilting demonstration set up, and of course, I said yes.

With my friends Delani and Grace helping do sewing demos on machines and Kate doing hand quilting, I got the “brilliant” notion to prepare some strip sets to make nine patches, and let people sit at one of the machines, with supervision if needed, and sew a nine patch or two.  For every block they sewed, they got a chance to win the quilt that I would finish after the Dutch Oven was over.  It was a real hit.

You can see the beginnings of the quilt on the design wall.

Grace, who had brought a hand operated Featherweight machine, was running back and forth between our set up and her husband’s blacksmith demonstration, so Delani and I were kept so busy helping folks make their blocks that we barely had time to run to the restroom and get something to eat when the wonderful Dutch Oven cooked food was ready.   That night, I had my husband draw a name to win the quilt.  The winner was our pastor’s mother who is a fine quilter and told me to give the quilt to someone else because she really didn’t need another quilt and would rather someone who really wanted it to have it.  Very generous of her.  So Delani and I picked a young girl about 12 years old who had come back to our booth over and over again because she loved making blocks.  She had wanted to learn to quilt so badly and didn’t have a machine at home that she taught herself to handpiece from watching YouTube videos.  Here is the quilt she was thrilled to win.

As you can see, I used the same “Strip Tube” border on this one, which is named “Everything But the Kitchen Sink.”  The pattern is Confused Nine Patch from the Big Book of Scrappy Quilts. When I took this to show and tell at Quilter’s Anonymous and told the story of the winner, one of our members, who it turned out only lived a couple miles away from the girl’s family, volunteered to give the young girl an older machine that she no longer needed.  Aren’t quilters wonderful people?

Then, of course, the ladies at the Hall, including myself, taught the kids’ summer quilting class again this year.  We want to make sure the younger generation has exposure to quilting and we have both boys and girls attending, ages 9 to 18.  We had a lot of new kids this year, and a fairly large total number with 9 students and 4 teachers.  Fortunately, because we prefer a one-on-one ratio, a couple of the ladies who have joined our group within the last year and are new quilters themselves, stepped in and helped with some of the returning, more advanced students.  The kids make a communal quilt that is then donated to a charity.  This year’s will go to a kid’s cancer camp.  This is my favorite quilt of all the ones that have been done in the 11 years I’ve been participating as a teacher.

The kids learned not only how to sew together fabric and make half square triangles for the ears, but how to sew on buttons for the eyes, noses, and tags for the collars and to hand embroider the mouths.  By the way, I wonder if any of you know the answer to the question I asked all the students during the button sewing portion of the class.  Why do we sew the buttons on before we embroider the mouth?  The answer:  If the mouth was embroidered first, the animals would bite you when you stuck the needle in to sew on the eyes or the nose. One of our advanced students did machine applique around all the balls and birds that were fused onto the background fabric.  She did it under my supervision, which wasn’t much supervision after I showed her how to do the first one.  She did a beautiful job.  I brought the quilt home to do the quilting on my long arm and did the binding as well.  I  am obsessed with the fabric we used for the back.

The cat fabric was donated to our group.  The dog fabric was left over from the back of the dog quilt I made last year, (see my post “It’s Ruff Making a Dog from Scratch”), and the paw print fabric surrounding them was purchased.

The August meeting of Quilter’s Anonymous was the deadline for finishing the yearly quilting challenge.  This year’s challenge was to make a quilted project with as many fabrics as you could, using at least two of the 5 scraps given to you earlier in the year, which were hidden in brown paper bags.  As an ironic aside, one of the “scraps” I got in my bag was a completed hexagon for a one block wonder.  Made me laugh, but I didn’t use it.  There were two prizes, one for people’s choice and the other for the most scraps used.  As serendipity would have it, in July I took a class to make a “Color Dance” wonky log cabin sponsored by the guild.  It was great.  We each brought piles of pieces of fabric and got to go around shopping in everyone else’s piles.  A really fun exchange.  Anyway, I decided this would be the perfect challenge quilt for me since I didn’t have anything else even started, and this one was small enough I thought I could finish it by the August meeting.  I was able to, by the skin of my teeth, hand sewing the label on 20 minutes before I left home for the meeting.  Here is a photo of my efforts.

I call it “Quirky, Quakey Cabin” the quakey because I live in California about 40 miles from the earthquake capital of the world.  Well, I won hands down for most fabric used, 337 unique pieces counting the border and the two piece Suzy’s Magic Binding, but not including the back.  You could say I had the competition sewn up.  Another funny thing about this quilt is I thought, “Oh, good.  I can use up a lot of my scraps.”  But in my zeal to maximize the number of fabrics used, plus wanting to have the perfect fabrics to transition between the color changes, I ended up buying about 40 fat quarters, so now I have more scraps than I started with.  The best laid plans….

The Hall Quilt Show is coming up on the 15th of September, with all quilts that are being displayed being gathered this Wednesday.  Normally, I have at least six or seven quilts in the show, but this year, the only quilt that I had kept that was finished was the wonky log cabin I just talked about.  So, I scrambled around looking for things that I hadn’t put in the show previously, and found one lap quilt that I had planned to give to the guild as a comfort quilt.  Then I remembered that I had gotten some of the components made for a mystery quilt sponsored by Carole at https://frommycarolinahome.wordpress.com/ called Scrap Dance Two Step.  So I decided I could get on the ball and finish it in a couple of weeks and luckily the mystery reveal had happened in July.   Here is the result called “Super Nova”:

Once again, the colors don’t come out well with my camera lately, so here is a better photo with the quilt on my longarm machine, Rosie.  

Carole comes up with the coolest designs and she says she will be starting another mystery quilt in her Scrap Dance Series soon, so if you’ve never been to her blog, I highly recommend it.  She gives one clue a month, so you can work on it a little at a time, or wait till the end like I did and rush.   I was also able to borrow back one of the quilts that had been auctioned off for a fundraiser, so there will be 4 of my quilts in the quilt show.

So now that most of the rush is over and deadlines passed, I’ve started playing with my Mariner’s Compass ruler that I talked about in my last post.  It is going really well, and will post more about it later.  Also, it is almost time to get raffle tickets and flyers ready for sales for the custom quilt raffle.   So many quilts I want to make, so little time in a day.

Do you have a hard time saying no?

I Have A Tool For That!

003

People who know me well are used to hearing this from me on a frequent basis. And as it turns out I usually do have a tool for almost anything I want to do.  My favorite thing to do is to visit the vendors at any quilt shows I go to in order to see what these clever people have come up with to make my quilting easier and more productive.  Another thing that anyone who knows me well will tell you is that I detest paper piecing and will do almost anything to avoid it.  I absolutely love the Mariner’s Compass pattern, and have always longed to make one, but alas, it is paper pieced.  But wait…in the August edition of American Quilter, I saw an ad for a Mariner’s Compass tool that avoids paper piecing.  Of course, I immediately went to the website of the inventor and watched her tutorial to find out if it was for real.  Then I purchased the tool, the companion booklet, and another tool that looks very handy for cutting angles.  Here is a photo of the package I promptly received.

compass labeled

The tool was developed by Robin Ruth Design, found at robinruthdesign.com.  I have been chomping at the bit to try it out, but have been sewing my fingers to the bone trying to get ready for our local quilt show at the Hall where I quilt with a great bunch of ladies on a bi-monthly basis.  We also just finished our summer quilting class for the local young people.  But I will address those things in another post.  There is a lot of blogging that hasn’t been getting done.  I will let you know once I have a chance to try out the tool how it all come out.

Speaking of tools, I also found a handy tool to make it easy to change out the needle on my longarm machine, which has been a dreaded task for the last three years since I got my longarm.  For those of you unfamiliar with longarms, the needles don’t have a flat spot on the shaft like regular machine needles do, and of course it is critical to get it inserted properly, which is very difficult when you really are using the Braille method.  So I avoid changing my needle very often, which has caused problems when it gets dull or slightly bent from deflection caused by the speed of the machine.  Here is a photo of the tool.

needle inserter labeled

As you can see, you just insert the needle into the hole going in the direction that you want it inserted into the machine.  The needle stops at the bottom of the shaft, then you can just push it up into the hole in the machine, and it pushes the shaft all the way up so that it is fully inserted.  Then tightened the set screw on the machine.  There is also a slot in the opposite end of the tool that can be used to make adjustments to the needle so that it is in straight if you aren’t happy with the position once it’s inserted.  What used to take me at least 20 or 30 frustrating minutes took me about 2 minutes yesterday the first time I used it.  Since it is recommended by many expert longarmers that you change out the needle after every one or two projects, this is going to be a tremendous time saver.  I also discovered it works for regular machine needles.  It is manufactured by Creative Notions and I found it at Nancy’s Notions.

Since we are on the subject of tools, I am going to share a few more of my favorite “I have a tool for that” tools.  The first one, or two, are the Tucker Trimmer and Tucker Trimmer II by Deb Tucker at studio180design.net.

trimmer labeled

These tools make squaring up half-square triangles and quarter-square triangles especially a breeze.  Just slap your tool on top of the component you want to square up with the tool’s diagonal line lined up on the diagonal on the component, making sure you have room to trim to size all the way around, trim, turn component 180 degrees and line up the bottom left corner of the size you want to trim to along the corner of the component and trim.  The Tucker Trimmer shown on the half-square triangle is even inch and half inch increments and the Tucker Trimmer II is in quarter and three-quarter inch increments.  These two tools allow me to trim up piles of components without really having to think about it.  They are also great for cutting out squares of fabric from corners of yardage or fat quarters.

These next two are also from Deb Tucker.  This first one is the V-Block Trimmer (also known as a triangle in a square), which is the first of Deb’s tools that I purchased.  Many people feel they need to paper piece these components, but not using Deb’s method.

V block labled

The tool and the instruction book are very easy to use, with all the measurements you will need written right on the tool.  Everything is cut from strips and is slightly oversized so that there is room to trim down with the markings on the tool.  I made this queen sized quilt with dozens of these components in nothing flat using this tool.

The last tool I’m going to talk about is the Corner Beam tool.

corner beam labled

Just like all the other Deb Tucker specialty rulers, the booklet and ruler are easy to use, with everything made from basic strips and squares.  I’ve found these components are great to use in the corners of borders to make a nice transition around the corner.

I want to make it clear that I have no interest, financial or otherwise, in any of these tools or companies.  Just wanted to share some of the things that make life easier for me and hope you find them helpful as well.

Happy Stitching!


Heading West Once Again

003

In January I made a western themed quilt to auction off at a fundraiser  for our rural museum that the community here has been working on for many years.   See my last post, “Playing with Potholders” to view that quilt.  The quilt was so popular that there was quite the bidding war, so the powers that be asked if I could make another one to auction off at their next fundraiser on March 11th.  This time the fundraiser will be dinner and a dance and they are calling the event “Boot Scootin’ Boogie”.  The request was to include a covered wagon in the design, so I set out to search for covered wagon fabric.  It was nearly impossible to find.  I was only able to find one piece of antique fabric, and it just wasn’t what I wanted.  So I decided I would try an embroidered design as the centerpiece since I have an embroidery machine and  digitizing software on my computer.  Everything I tried came out too small.  I guess I could have done applique, but I am too lazy to take that on.  So I searched and searched, and I finally found the panel in the photo above at Ebay.  I just love the old west look of the panel and the composition is simply charming.  It came complete with the printed “border” of triangle squares and the wood look border.  I don’t know the manufacturer since the selvedge only has the title “Point of View” on it.

I plan on adding some sort of additional pieced border at the top and bottom and then adding blocks that I will embroider with a covered wagon, a stagecoach, a ranch scene, a town scene that I purchased and perhaps some cattle and/or horses, then some additional borders..  I haven’t decided exactly what will look right yet, but I need to get a move on since March 11 is right around the corner.

This next photo is the fabric choices that I have to use in the rest of the quilt.  You can see the covered wagon embroidery that I experimented with lying on top of the fabric I intended to use as the backdrop for the embroidery.  I thought it had a nice prairie look to it.  I might also design some additional detail to go into the embroidery design like mountains or something.  Anyway, I was really excited to find the wagon wheel fabric right in front on our trip to town yesterday.

002

Time to get my creative juices flowing and get this quilt done.

Playing with potholders

002

Sadly, I haven’t had a whole lot of time to quilt lately because I have a lot of end of/beginning of the year responsibilities, including duties as the volunteer bookkeeper for my church, personal income tax stuff to gather for our accountant, 24 fruit trees and around 60 rosebushes to prune!  I have no idea why I decided to plant so many rose bushes, but they are certainly lovely when they are in bloom.  Besides, I have really been at one of those seasons that I’m sure most quilters have where you just feel dry and uninspired. So, I have tackled only a few small projects in the last couple of months.

I found the pattern and instructions for these really cute butterfly potholders above in one of my favorite quilt stores.  The pattern is “Flutterby Pot Holders” by Valori Wells.  Since I needed some items to add to my quilt guild’s monthly raffle basket, I decided these would be a nice addition.  Besides, it gave me another opportunity to use up  a few scraps out of the ever overflowing scrap bins.  They were really fun and pretty easy to make.  I most enjoyed the design opportunities of picking just the right fabrics.  And of course, as always I learned something in the process.  This time I learned the reason to clip you curves before you turn something right side out through a very small opening.  I totally forgot to do that on the purple and orange butterfly, and you can see that the tail and the top of the “head” aren’t nearly as nicely defined as on the peacock butterfly.  But it was so difficult to turn these right side out, that I wasn’t about to fix the mistake.  We’ll just call this, not a mistake, but a variation.

The next set of potholders I decided to make were inspired by a saying I spotted in a magazine.  This Sunday, our pastor is away with the youth group up at a Christian snow camp in the High Sierras, so one of our Elders will be in charge of the service.  He has decided he wants to do an old fashioned Bible quiz, and asked me to figure out small prizes to give out.  Why does everyone seem to think that I am the answerer of all questions?   I don’t know, but I put my thinking cap on, and came up with these potholders.

009

Again, using scraps out of the overflowing bins, the one on the left is a raw edge applique technique that I’ve used a couple of times to make entire quilts.  It’s a lot of fun to make and pretty easy.  As a matter of fact, I was asked to teach the technique to the kids during our summer learn to quilt classes at our little rural Hall.  At that time, instead of making an entire quilt, we thought it would be fun for the kids to make them into potholders and did it as a quilt as you go project since the applique technique really lends itself to doing that.

The things I learned doing this project is how to use my digitizing software to make the lettering curve around the design on the blue potholder.  I’ve had my digitizing software for around 17 years, and I am really just now learning how to do more than simple lettering.  The other thing I learned is the tool I use for joining the ends of my binding, The Binding Tool by TQM Products, doesn’t work very well on such small projects since you have to leave a 12 inch opening to manipulate your binding and trim it just the right way.  The largest side of the potholder on the right was only 11 1/2 inches, so that idea was out.  I used my old, far inferior way of joining binding, which involved tucking the last end into the first end which is ironed at the correct angle….very bulky, and it shows at the top right.  But it looked okay, so I let it go.  On the blue potholder, I learned how to adjust the tool, and got it to line up really closely.  The binding, once joined, was about a 16th of an inch too long, so I took up the excess by reworking the nearest corner.  I think it came out much better.

The last project I’ve gotten done recently was this quilt that I made specifically to donate for the silent auction to benefit the rural museum that some of the local residents have been working on getting up and running for many years to preserve the history of our area.  So far they have one building up filled with items on display as well as a couple dozen vintage farm apparatus.  When driving by quickly, the outdoor display kind of reminds me of scenes from Star Wars so bizarre looking is some of the equipment.

Anyway, here is the quilt, which I named “Riding Till the Cows Come Home” since the back it a print of cattle milling about, doing what cows do.

005

The learning experience on this one was adapting a pattern that I’ve used before, Labyrinth by Calico Carriage Quilt Designs, Debbie Maddy designer.  I absolutely love the interwoven effect. Here is how the original pattern looks:

Safe Harbor

The bidding was hot and heavy and the quilt was the most popular item donated.  Now they’ve asked me to make a quilt for the next fundraiser in March.  I think I’ve created a monster.  But I don’t mind because I really do love quilting.  The biggest challenge is they hoped I would do one with a covered wagon somewhere on it.  I looked on line and the only fabric I could find was an expensive piece of vintage fabric.  I think they are just going to have to take what they get.  I’m sure as soon as I’m done, a lot of fabric lines will come out with covered wagons.  It always happens.

Dog Bites Quilt Show

041

Friday was our annual quilt show at the circa 1890s Hall.  Our quilt show is not judged and there is no voting on favorite quilts, but just is an opportunity to showcase local talent and vintage quilts from local residents.  It also encourages people to buy raffle tickets for the handquilted queen sized quilt that you can get a glimpse of just to the right of the doorway.  One hundred percent of the proceeds from the raffle goes toward scholarships for our local young people.

As you can see, my Fannie Mae von Nubbinwagger was front and center and generated interested from everyone who came by.  There was the best turn out for this event since I became involved ten years ago in the quilting group that meets at the hall to work on the scholarship quilt and various charity quilts.  The event was to open at 2 PM, but our first group came at 1 o’clock.  They were folks from out of the area who were driving by to check out the fire damage from the recent Chimney Fire that I posted about a couple of weeks ago.  They happened to see our signs out on the road, and came out of curiosity.  Of course, we welcomed them in early, and the folks continued to come on a constant stream until 7 o’clock, when we took a break for a potluck dinner and to draw for the donated door prizes for those who purchased quilt raffle tickets that day.  My assignment was to welcome people at the door, hand out programs and “white gloves” for those who wanted to pet the pretty quilts and answer any questions.  I was kept hopping the entire day.

Here is a better photo of our scholarship raffle quilt.  It is done in the Carolina Lily pattern. 007

The rest of the photos are of the quilts on display.  I hope you enjoy the photo tour.005

006009010011012013015016017018019020021022023024025026028029031032033035036037

The handquilting on this last one was finished while the quilter was evacuated from her home because of the fire.